
This tutorial shows you how to add a new website to Google Analytics without installing additional plugins like MonsterInsights. If you just want to set up analytics, you can add the tracking code to your site without any plugins.
The earlier you set up a Google Analytics account, the more historical data you will have for your site.
Since Google Analytics does not collect data retroactively, there will be no data in your GA account until you set it up and connect it to your website. So I recommend setting up a new analytics property as soon as you have launched your website to start collecting data.
Tracking website metrics is essential to assess your online presence and the performance of your marketing efforts. Google Analytics can be a powerful tool in your business if you set it up right and know which reports to look at.
There are two ways to create a new property in Google Analytics, depending if you have a new account or an existing account.
How to set up a new property in Google Analytics without any plugins
- Create your Google Analytics account
- Create a new property
- Fill out the property details
- Add the tracking code to your website
Create an account if you have never installed Google Analytics before. If you’ve already had the old analytics, Universal Analytics property, and want to create a new GA4 property, you can do so in your existing analytics account.
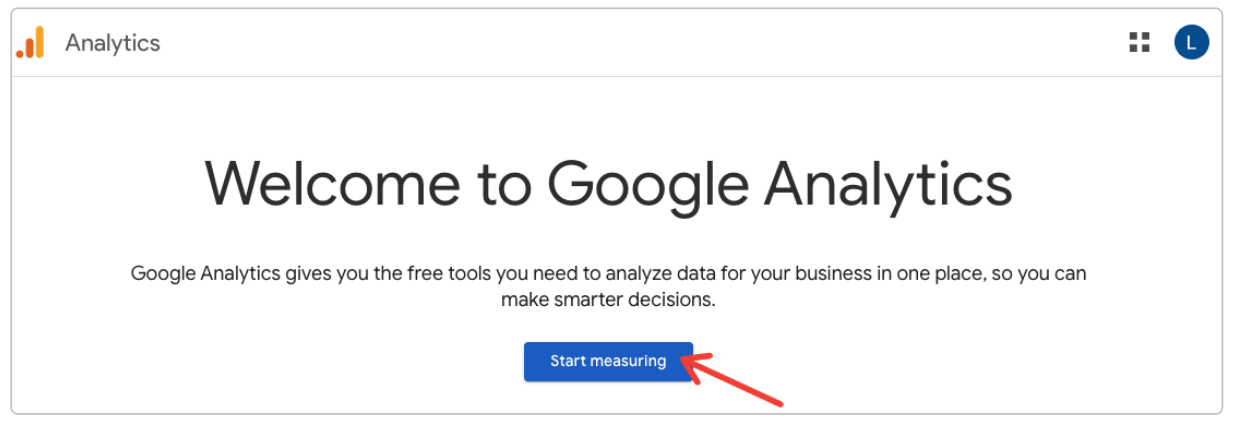
The first step is to go to analytics.google.com, and click Start measuring.
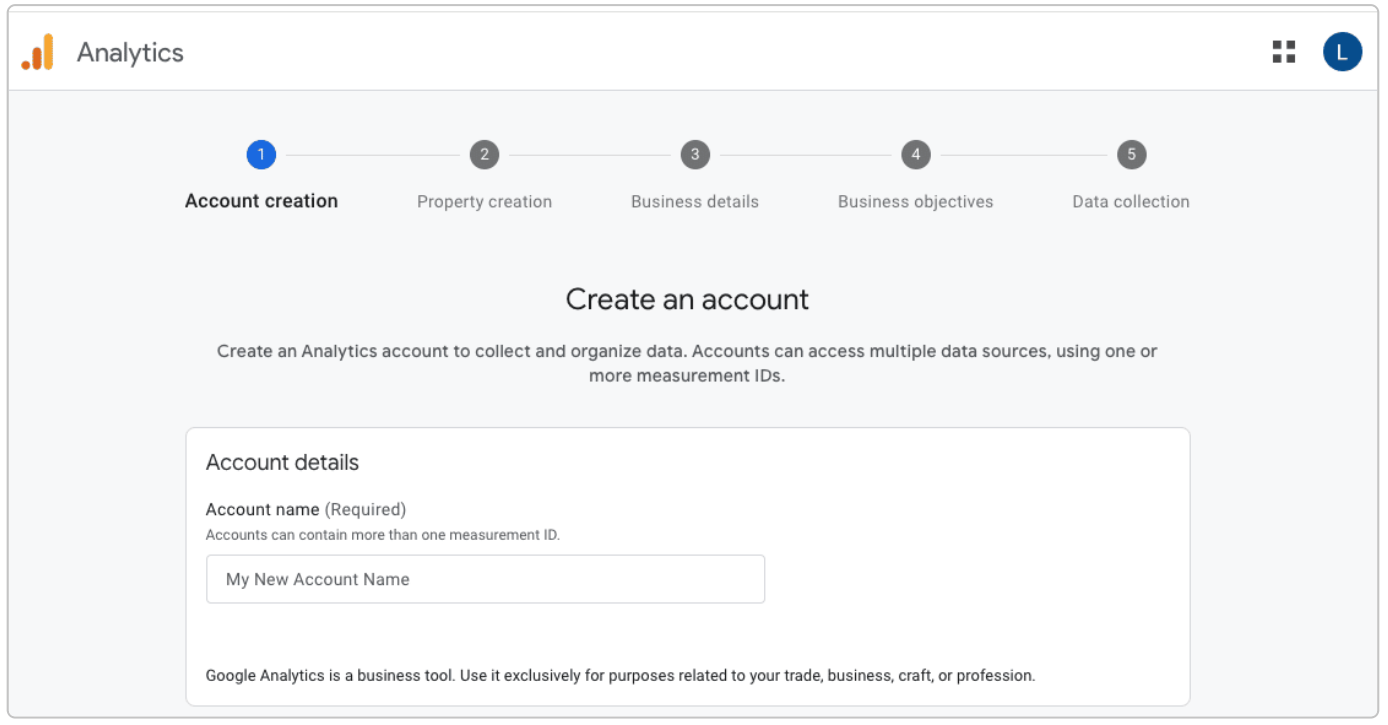
Step 1: Create a Google Analytics account
Give your account a name. I wrote my business name for mine.
Step 2: Create a new property
Give your property a name. For example, ‘your website name – GA4‘.
The next step is to select your reporting time zone. GA records visits for the reporting time zone that you select.
For example, if a visitor lives in a time zone that’s ahead of yours, they may visit your site on a Thursday in their zone and Wednesday in your zone. GA would count the visit as occurring on Wednesday.
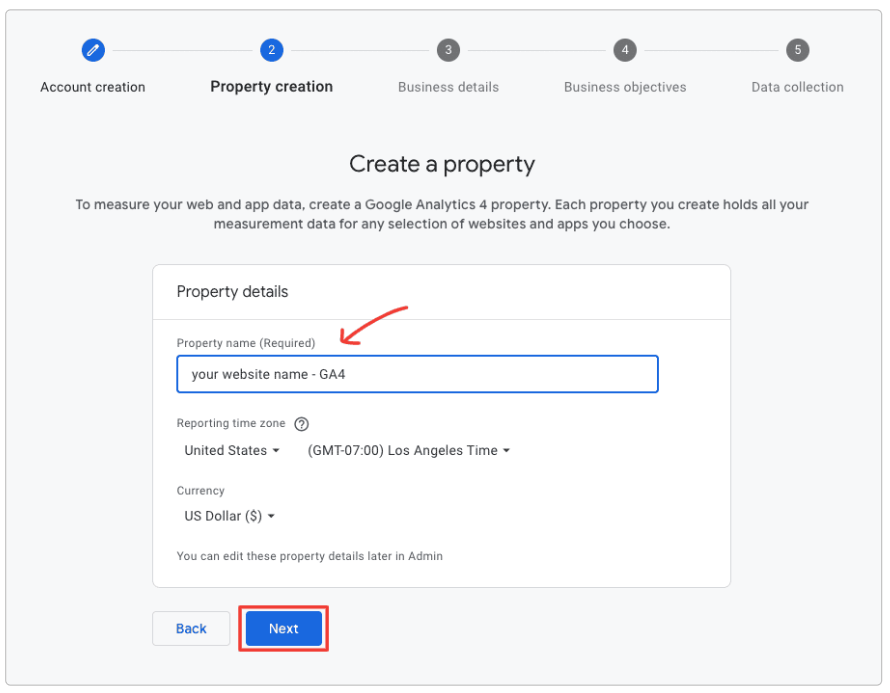
Keep in mind that changing the time zone after you create a property can affect data collection for a short period. You may see an increase or decrease in visitors when shifting the time forward or backward, which lasts the length of the time difference.
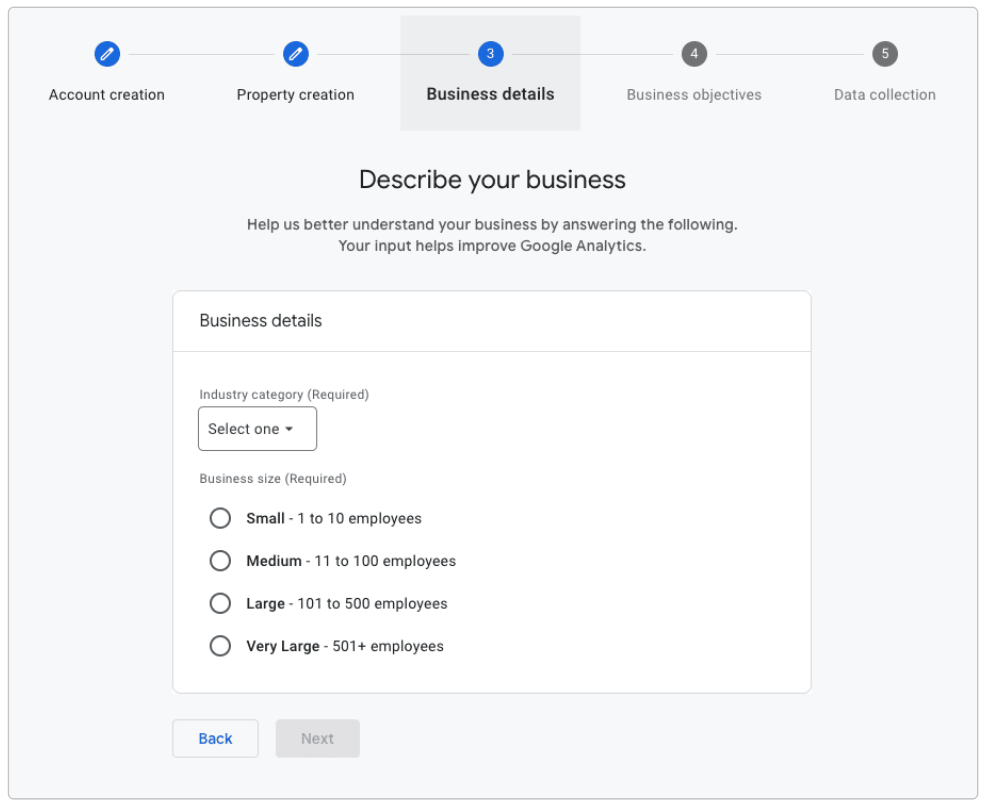
Step 3: Fill out your business details
Select your industry category and business size.
Step 4: Select your business objectives
You have several options when choosing your business objectives, including generating leads, sales, traffic, engagement, or “other.”
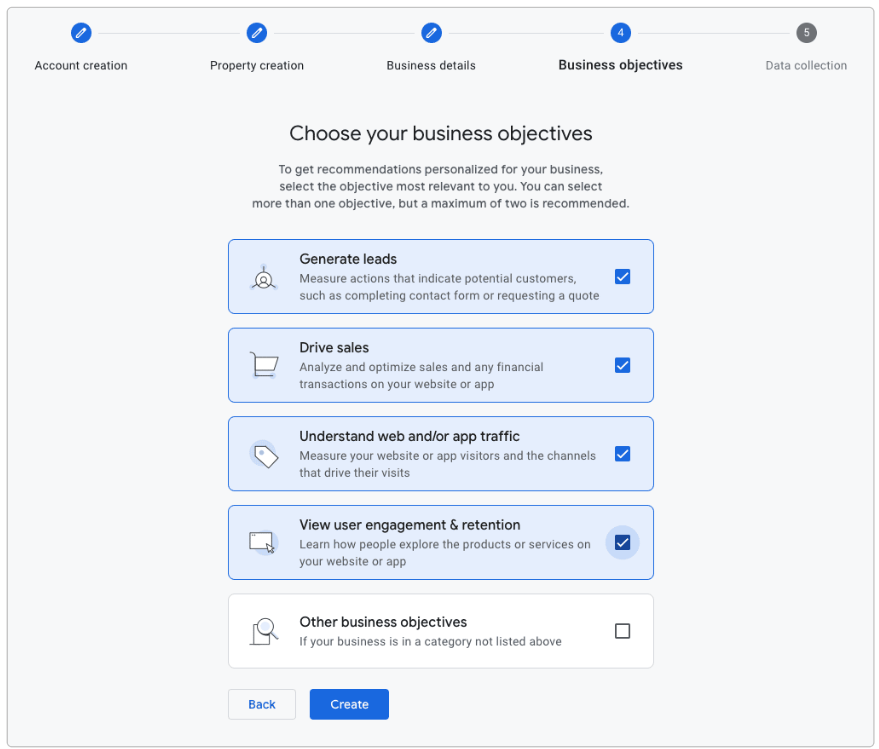
This creates some basic default reports in your Google Analytics account later on. For example, if you choose “Generate leads’, you will see a collection of default reports to help you measure lead generation.
The next step is to add a data stream to start capturing information from your property.
You can also edit these settings later.
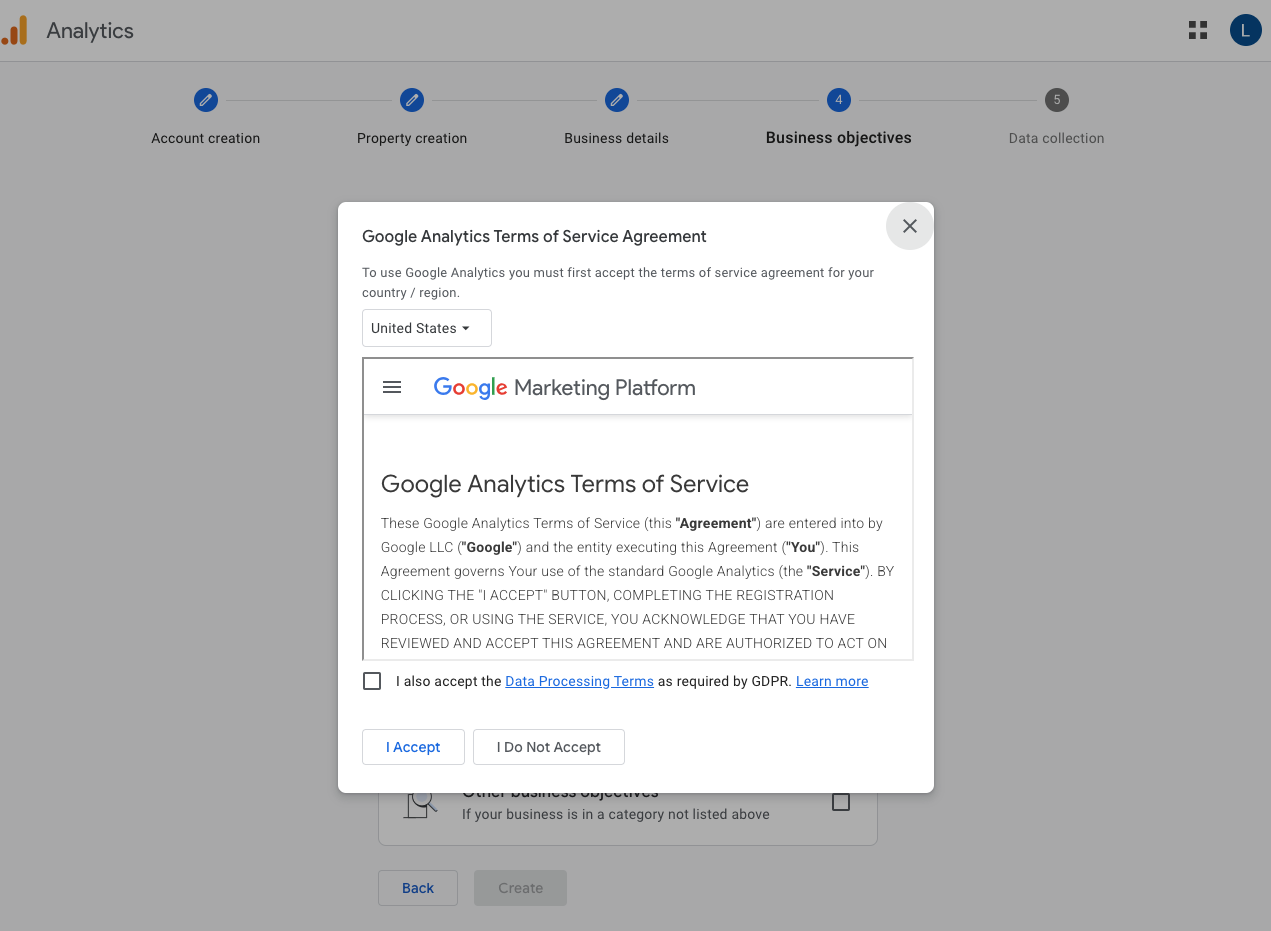
At this stage, the Google Analytics Terms of Service Agreement will pop up on the next screen.
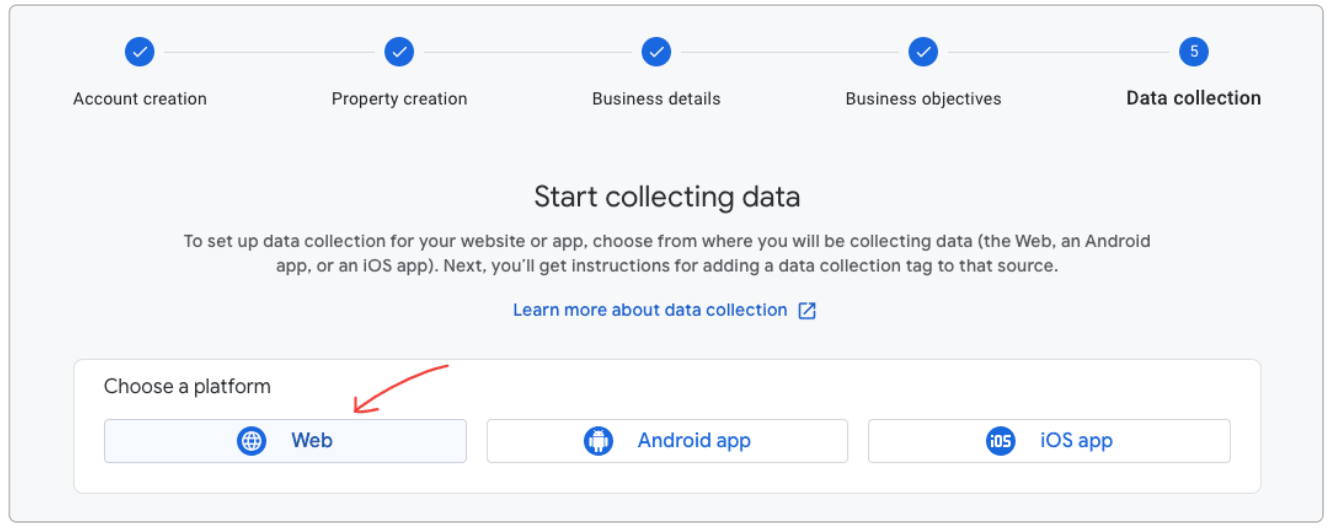
Step 5: Data collection
This is the final step in the account creation process. Choose ‘Web’. This creates a web stream in Google Analytics.
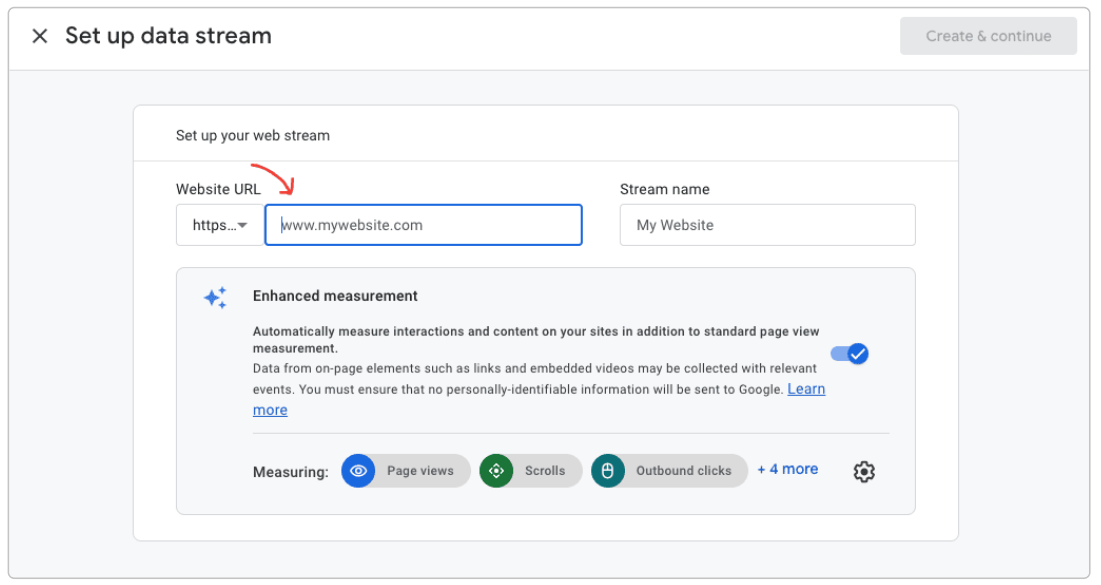
Then type in your website URL, and write your website’s name under ‘Stream name’.
Click Create & continue at the top right.
Voila! You’ve created a Google Analytics account and a new property for your site. But we’re not done yet. There’s one more step to add the tracking code to your website.
Step 6: Add the tracking code to your website
Select your newly created Data stream.

After creating the property and setting up the data stream, look for “View tag instructions” under the Google Tag section of your dashboard.
You’ll find instructions to add the Google Analytics tracking code to your website.
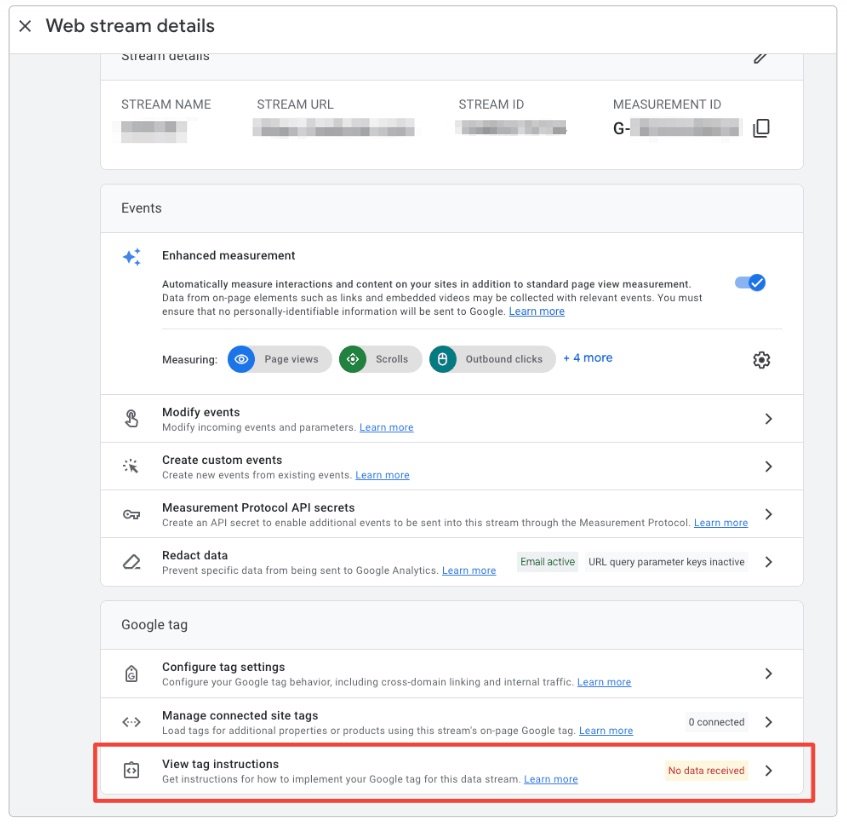
The code is a short tag identifying your GA4 account so that Google can start data collection. Here are some ways to add the tracking code:
- Adding the GA4 tag through your CMS
- Manually adding the GA4 tag to your site
- Using Google Tag Manager to add the GA4 tag
Using a CMS
This is the easiest method. Many content management systems (CMSs) include a GA4 integration which allows you to simply add the GA4 tag in the settings.
For example, WordPress allows you to use plugins to automatically place the tracking snippet on your web pages.
Search for Google Analytics 4 plugins from your WordPress site user dashboard. After installing and activating the plugin, you may need to grant access to your Google account to allow tracking.
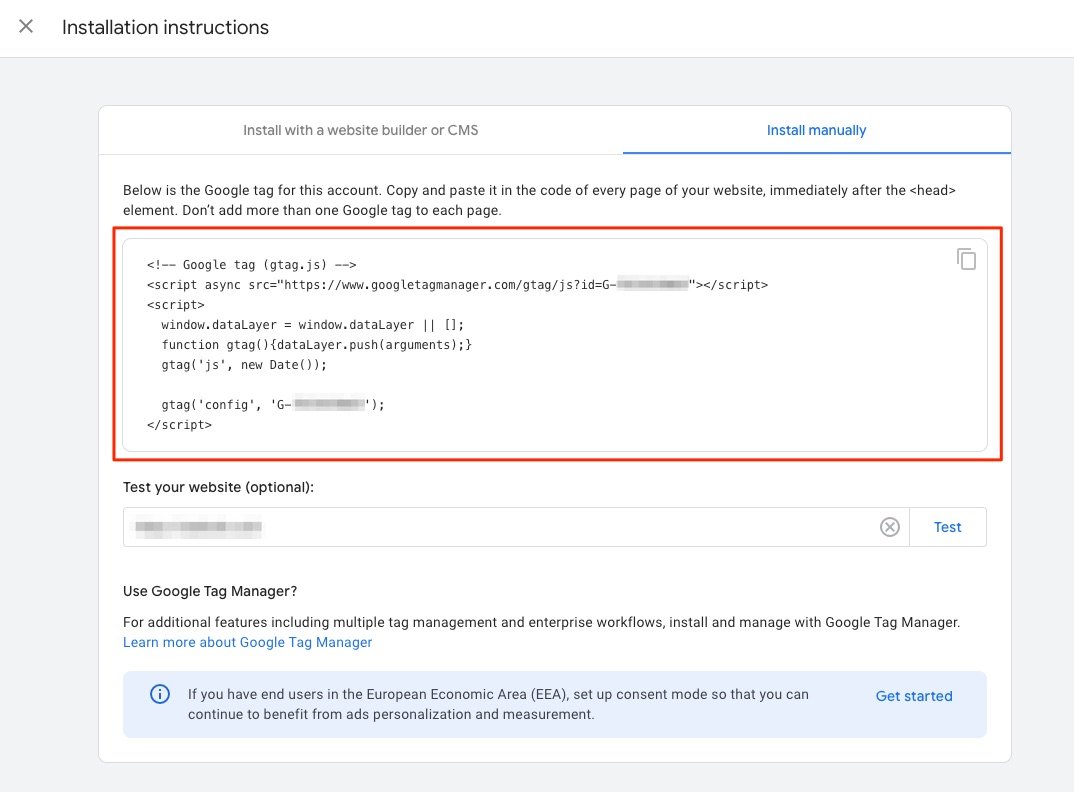
Manually adding tracking
You can also manually add your new GA tracking code to your website. From the instructions page, pick “Install manually.” This will bring up the JavaScript code with your Google tag ID that you need to add to your site.
Copy and paste the global site tag into the source code of your websites. It should appear immediately following the tag on each page that you want to track. Include this on every page, as Google Analytics won’t count page visits without it.
Using Google Tag Manager
Google Tag Manager simplifies how you add and update tracking code for GA4. You can create tags for Google Analytics 4 to track and add the snippet of code to your web pages.
It opens up more options, including setting triggering events.
How to set up a new property with an existing account
- Sign in to your account
- Create a new property
- Fill out the property details
- Add the tracking code to your website
If you already have an existing Google Analytics account, you might have the old Universal Analytics property (UA property), and want to create a new property for GA4.
Other reasons why you may want to create a new property could be for a subdomain.
Step 1: Sign into your existing Google Analytics account
Sign into your Google Analytics profile. From the dashboard, select the account that you want to use to manage the property.
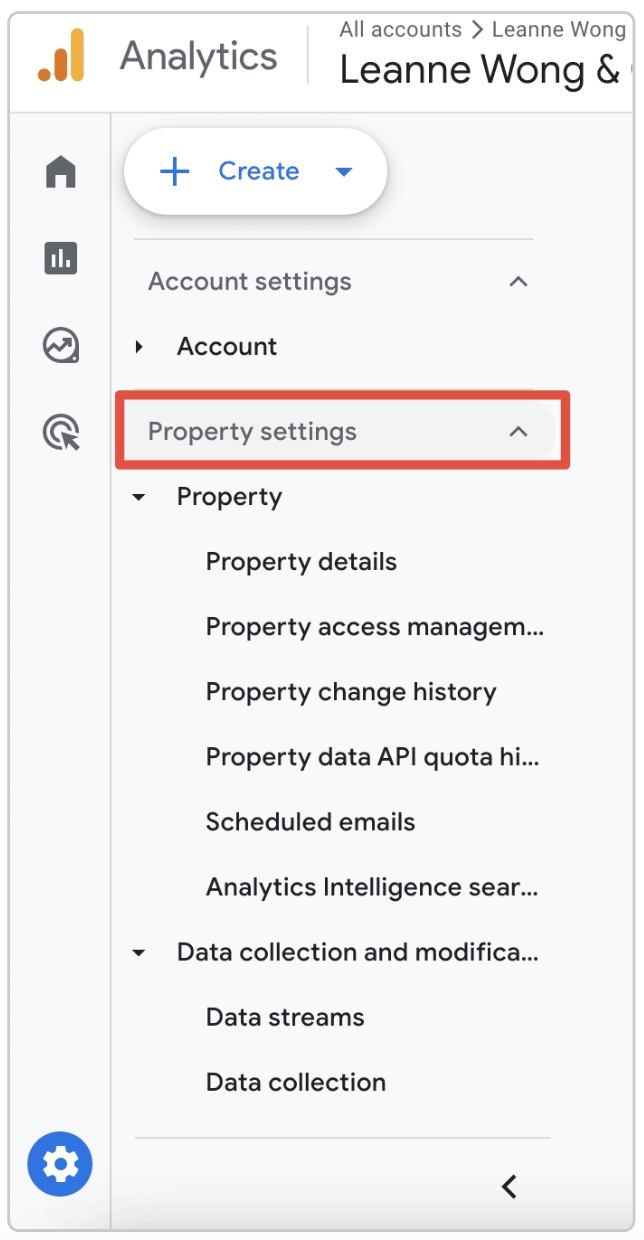
Click on the “Admin” button to reach the administrator dashboard. This page allows you to apply settings and manage separate properties.
You can view a long list of account settings and property settings in this area.
Under the property settings, you’ll find data collection settings, such as options for data streams, data import, data filters, and more.
Step 2: Create a new property
Click on the “Create” button in the upper left corner of the admin dashboard to start the initial setup for your property.
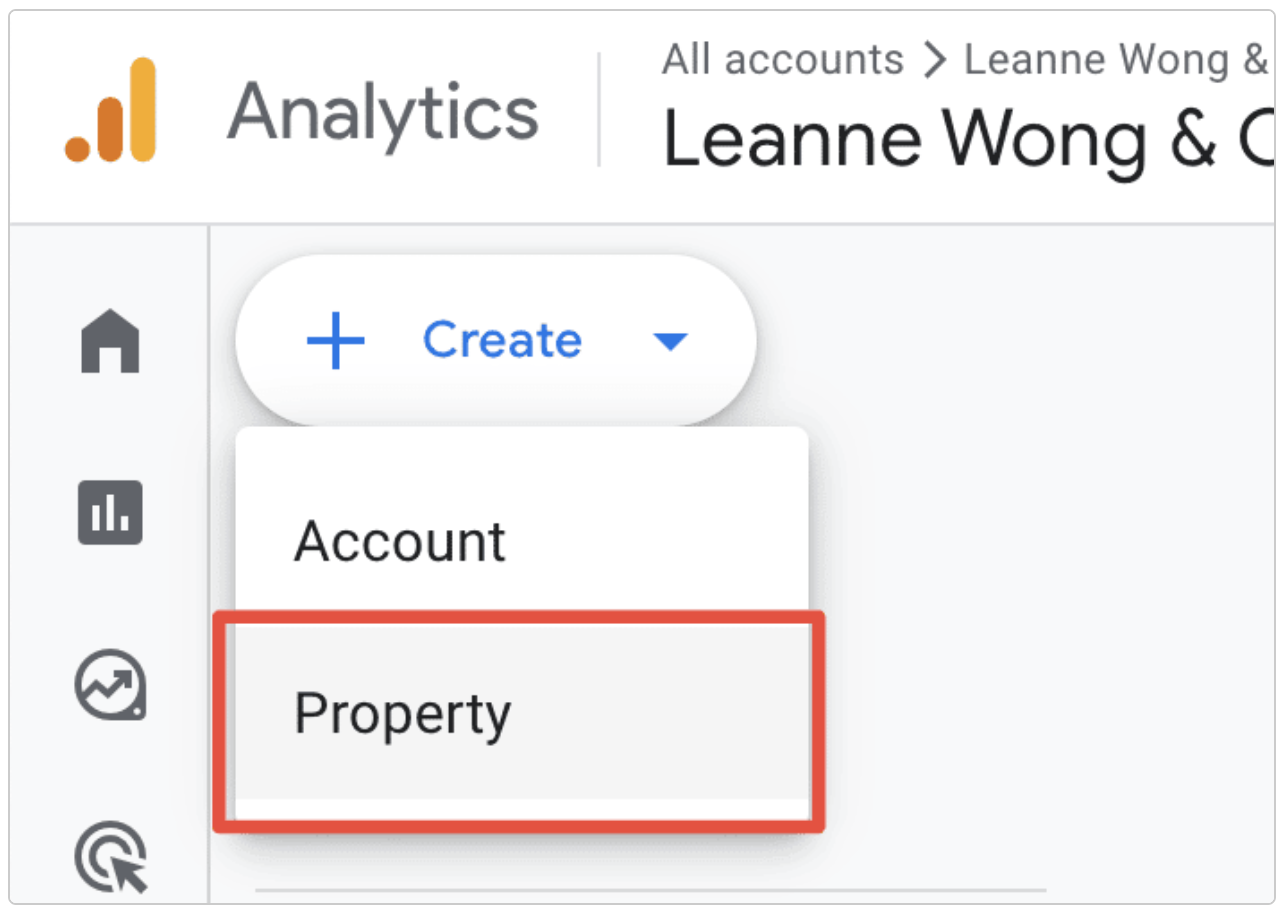
The dropdown menu includes two options – Account and Property. Select “Property” to create a new property.
This will bring up a property creation setup assistant, guiding you through the rest of the process of setting up your new entry.
Step 3: Fill out the property details
You need to fill out some basic information about your property, including:
- Property name
- Time zone
- Industry
- Business size
- Business goals
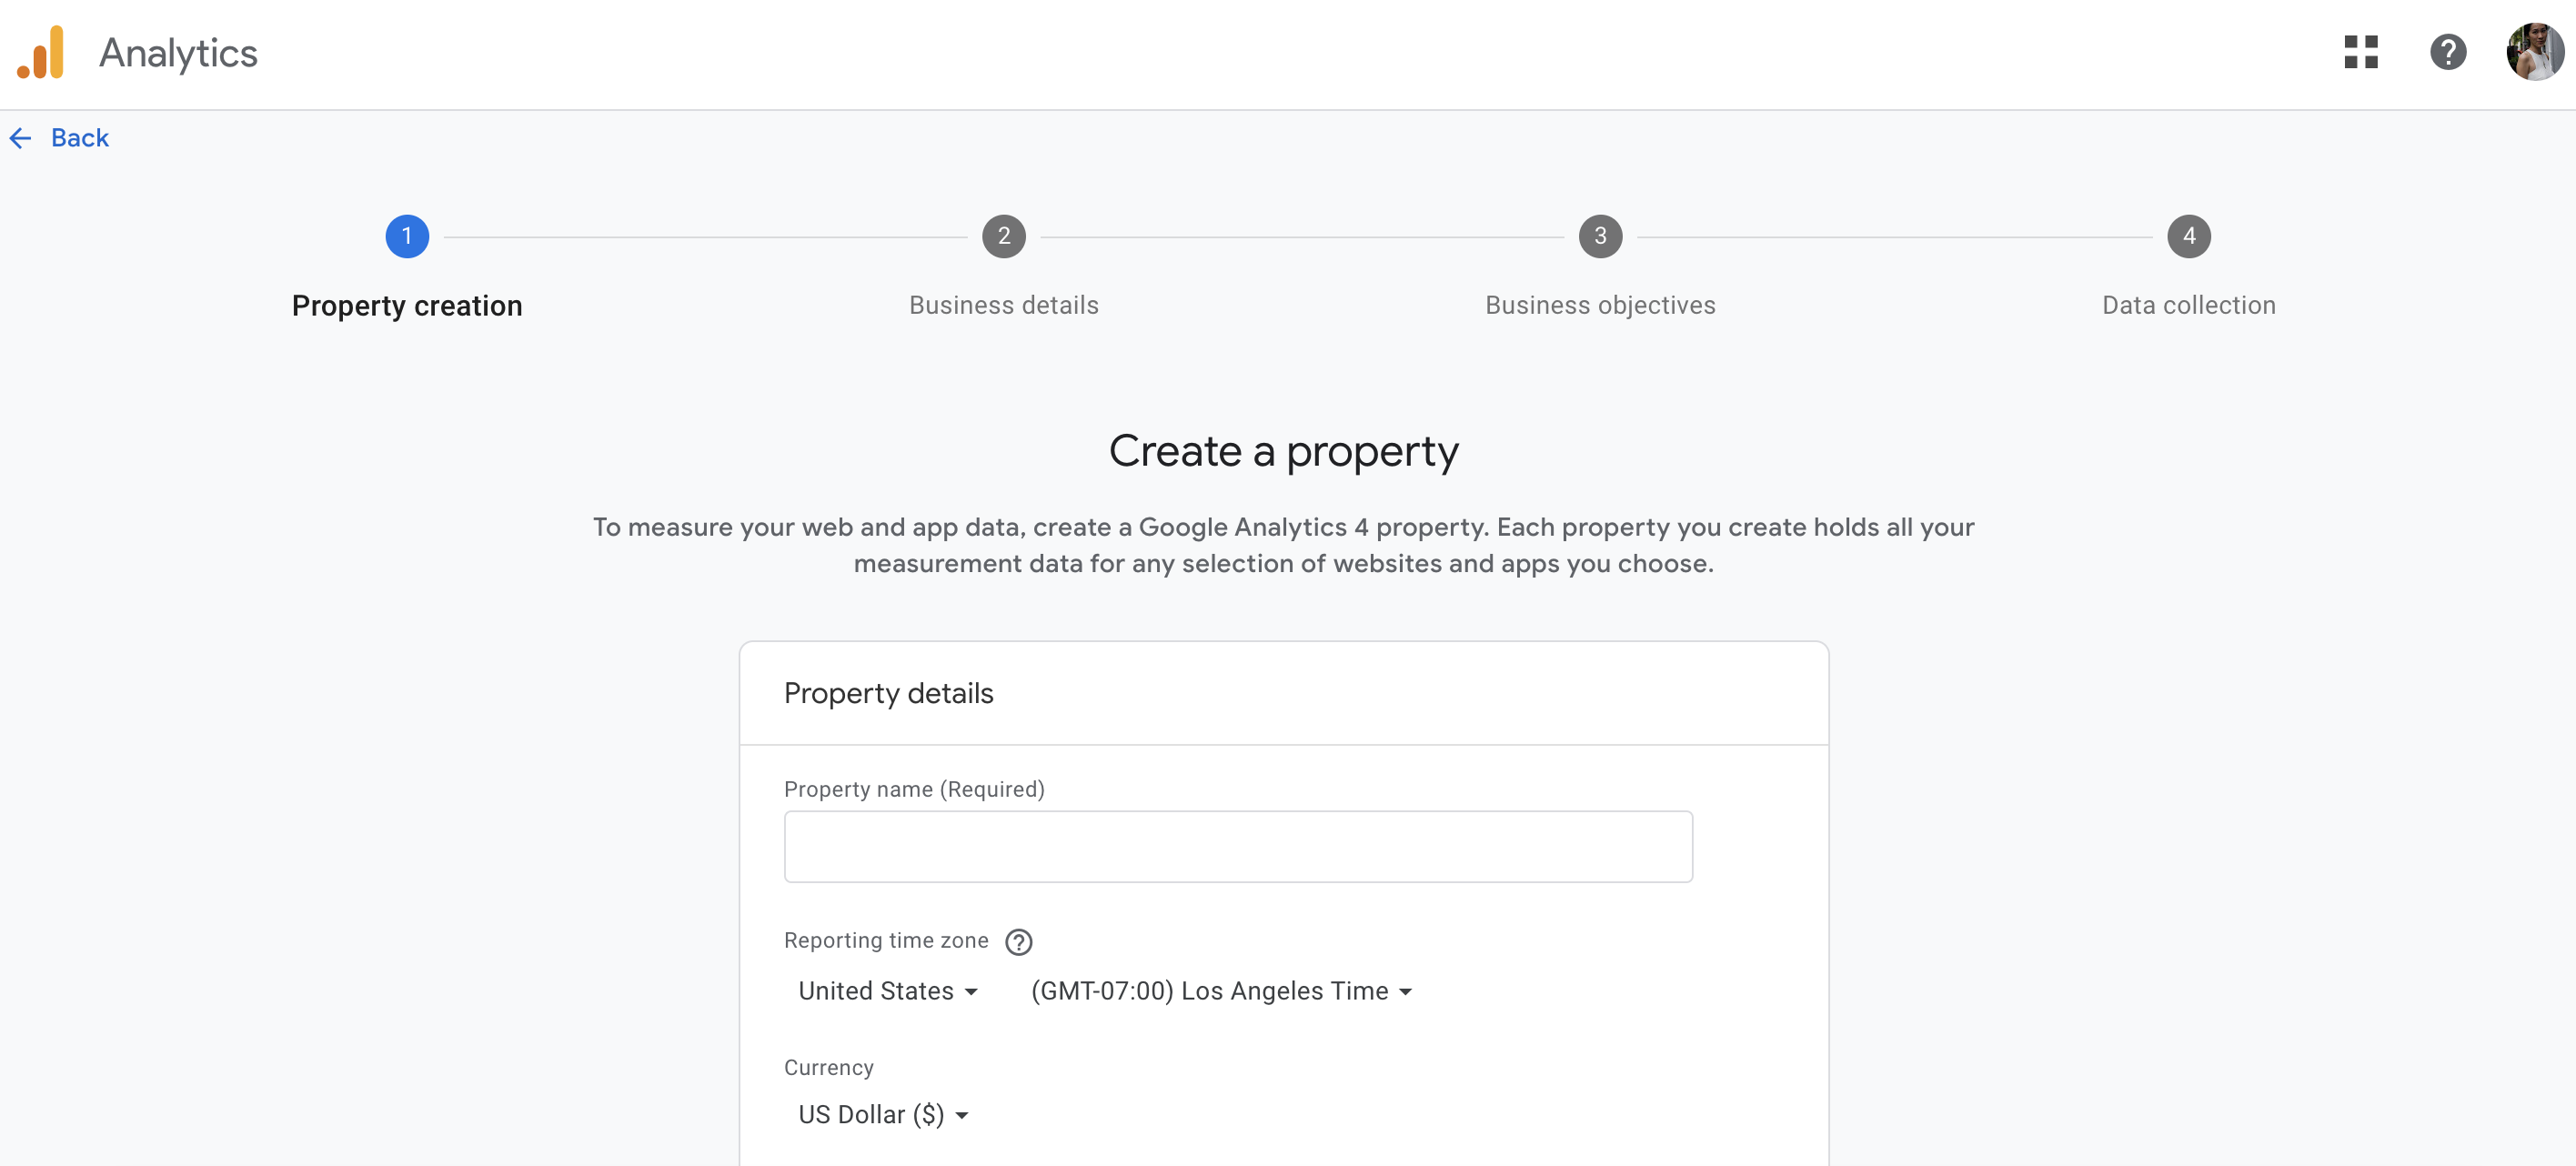
Property Name
The first step is to add a website name. If you have the older Universal Analytics (UA), you will want to use a naming convention for each property type.
For example, you can prefix your new Google Analytics 4 property ID with “GA4” to separate it from a Universal Analytics property.
Time Zone
The next step is to select the time zone for your new Google Analytics property. GA records visits for the reporting time zone that you select. Keep in mind that changing the time zone after you create a property can affect data collection for a short period.
You may see an increase or decrease in visitors when shifting the time forward or backward, which lasts the length of the time difference.
Industry and business size
The industry category you choose helps ensure that you work on creating audiences that are relevant to your specific business goals. Google Analytics tailors suggestions based on your chosen industry and reported business size. This can help you address your specific needs and make more data-driven decisions for your marketing campaigns.
Business Goals
You have several options when choosing your business objectives, including generating leads, sales, traffic, engagement, or “other.”
Selecting “other” gives you access to the general analytics tools and a basic set of default reports.
After entering these details, you can add a data stream to start capturing information from your property.
You can also edit these settings later. Click on the property column, select the existing property you want to edit, and update any of the details discussed.
Step 4: Add the Tracking Code to Your Website
Adding the Google Analytics code to your website is the last step. This is necessary for Google to track your new website metrics.
Additional property settings: Setup assistant, Google signals, and ads
You can explore many more options through the Setup Assistant in Google Analytics 4.
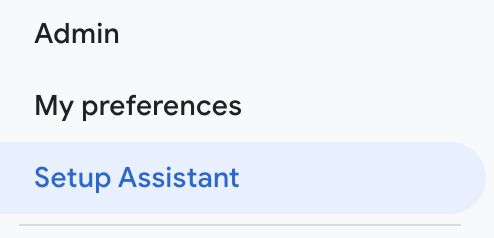
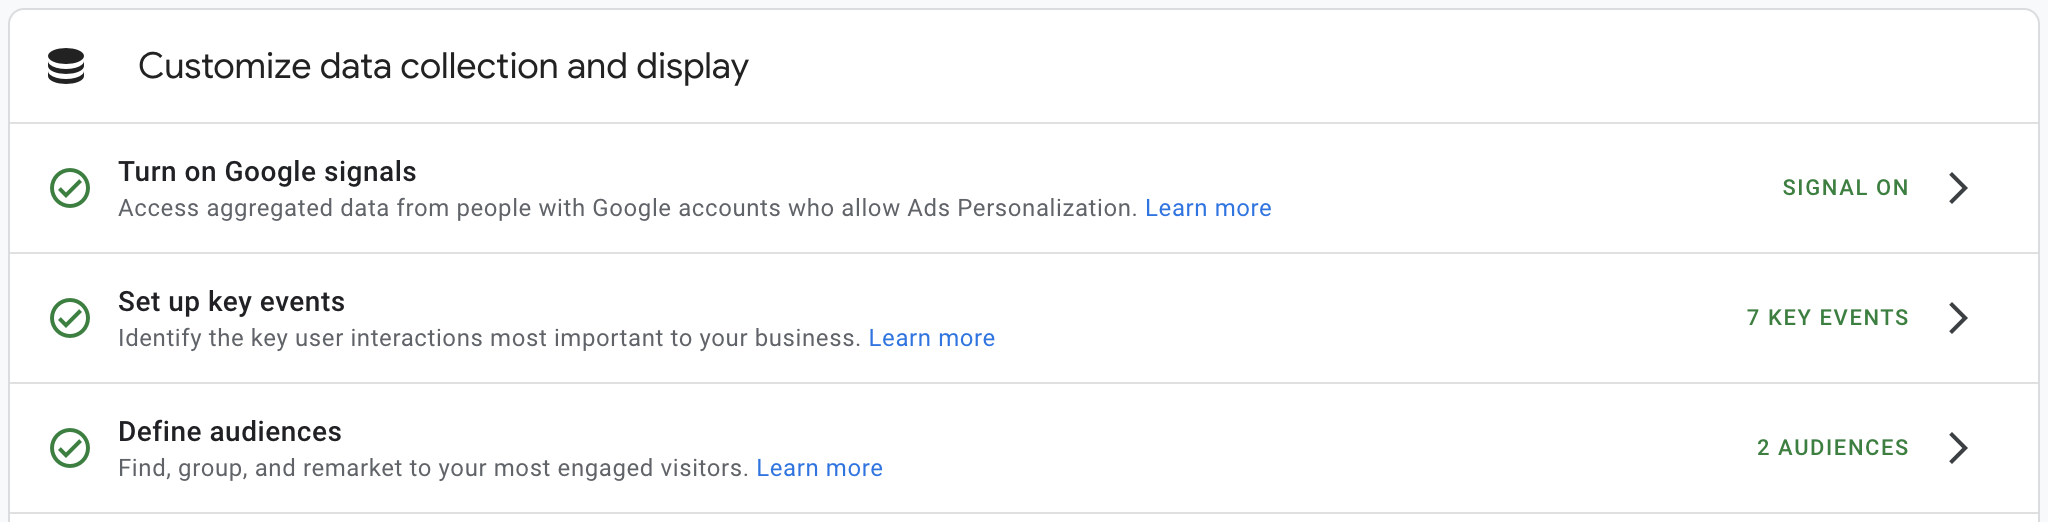
This takes you through additional property details and the ability to turn Google Signals on or off.
Enabling Google Signals allows you to set up key events and trigger events.
You can track each time that a user completes a specific action on your site, helping you better understand your audience and maximize your marketing return.
You can also link to Google Ads.
Linking your accounts allows data to flow from Google Analytics to your ads campaign and vice versa.
For example, you can track the performance of your campaign in Google Analytics or make your analytics audiences for remarketing lists in Google Ads. This is most useful for people who run advertising campaigns.


3 people reacted on this
This is helpful! I am yet to update my site and install Google Analytics properly. Thank you for sharing this. Happy to know that there are no plug-ins required.
This is soooo wonderful and appreciated! google analytics changed so much since i launched my first blog. i was searching and searching on google for something to help me. thank you.
Such an interesting read and so helpful. I try to avoid plugins unless absolutely necessary, so I love this method.