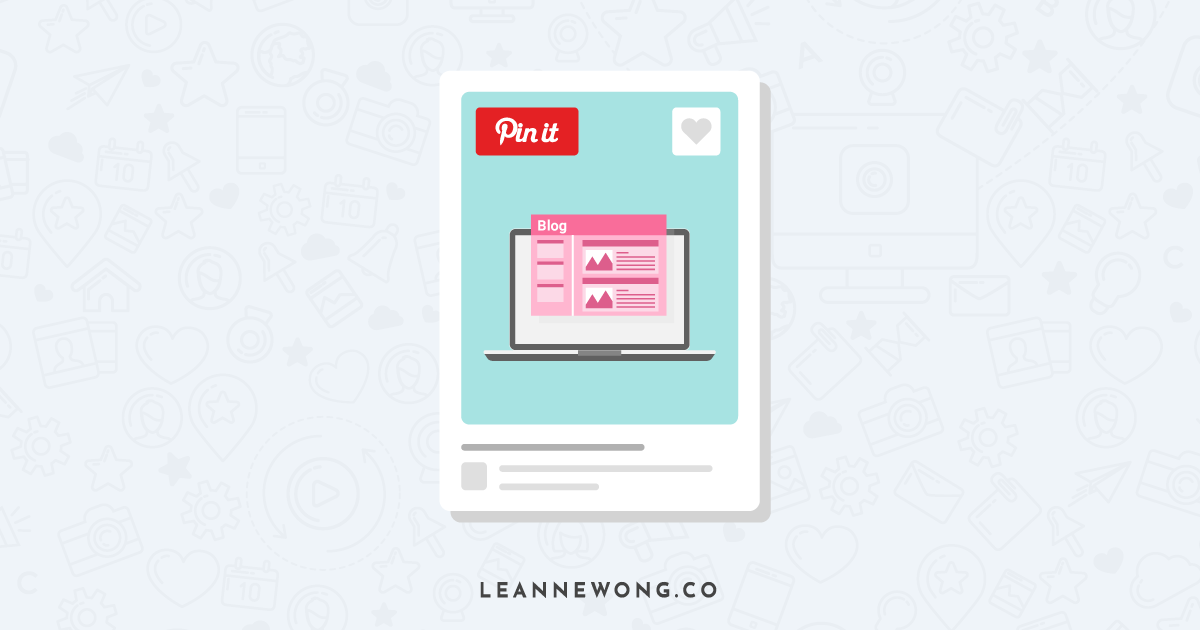
Rich Pins show extra details directly on your pin. Making them easier for people to interact with your pins and drive more traffic to your website.
There are 4 types of rich pins:
- Article
- Recipe
- App Install
- Products
Since enabling rich pins, the level of interaction on my pins have almost tripled – with more re-pins, likes and followers.
This is because rich pins provide context and help users like, share and save different types of content.
What are Pinterest Rich Pins?
Basically, rich pins provide more details to your pin itself. Such as specific recipe information, for example, but also links to purchase products or visit website articles.
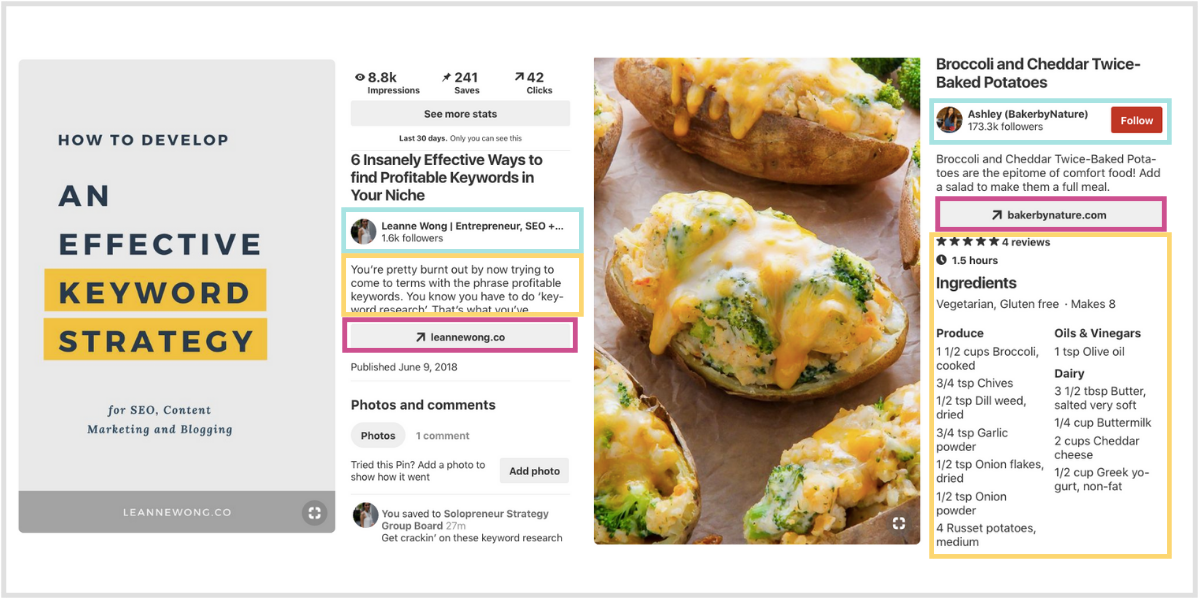
As you can see from the above rich pins examples (article, recipe),
Users are able to see more context about your pin such as:
- Author information
- Direct link to website
- Additional Pinterest description
This is similar to Google’s Rich Snippets, which are meta tags that provide additional information of a webpage on search results.

Alright, lets get into the exact steps to set up rich pins in 3 easy steps.
Step 1: Prepare your website with meta tags
First, you need to prep your site with meta tags. Which is basically HTML code in your website for Pinterest to pull information for your pins.
If you’re on WordPress, just install the Yoast SEO plugin and activate it.
Then, go to the Yoast’s “Features” tab under ‘General’. Make sure the “Advanced settings” option is “Enabled” and that will enable the metadata.
That’s it. Easy, right?
Step 2: Use the “Rich Pins Validator”
Visit the “Rich Pins Validator” on Pinterest.
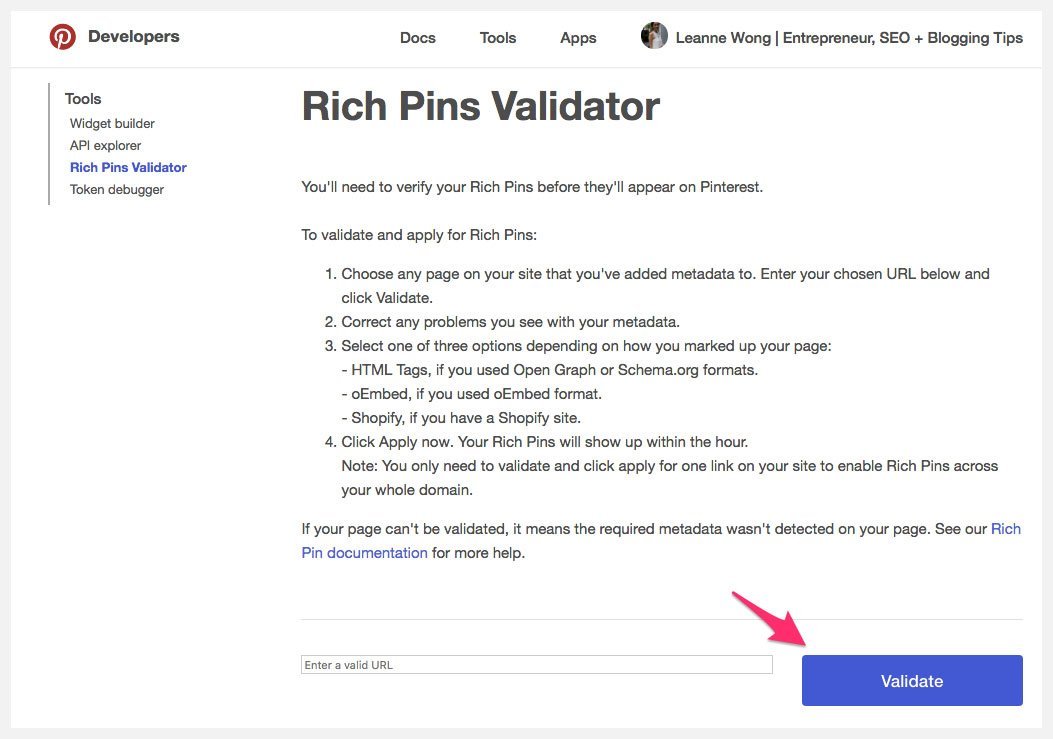
Enter your URL and hit “validate”.
Plug in a link to any blog post on your site (NOT the homepage). Any blog post will do and you only need to do this just once. Voila!
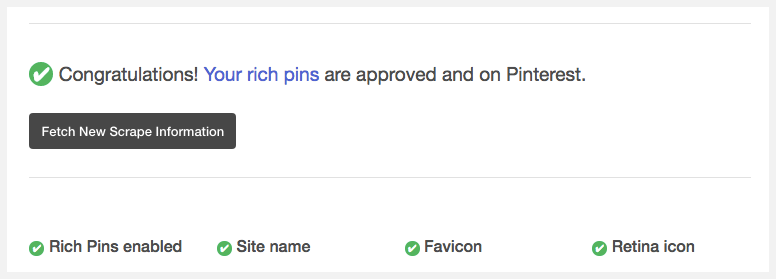
Then just wait for the confirmation page, which should look like this.
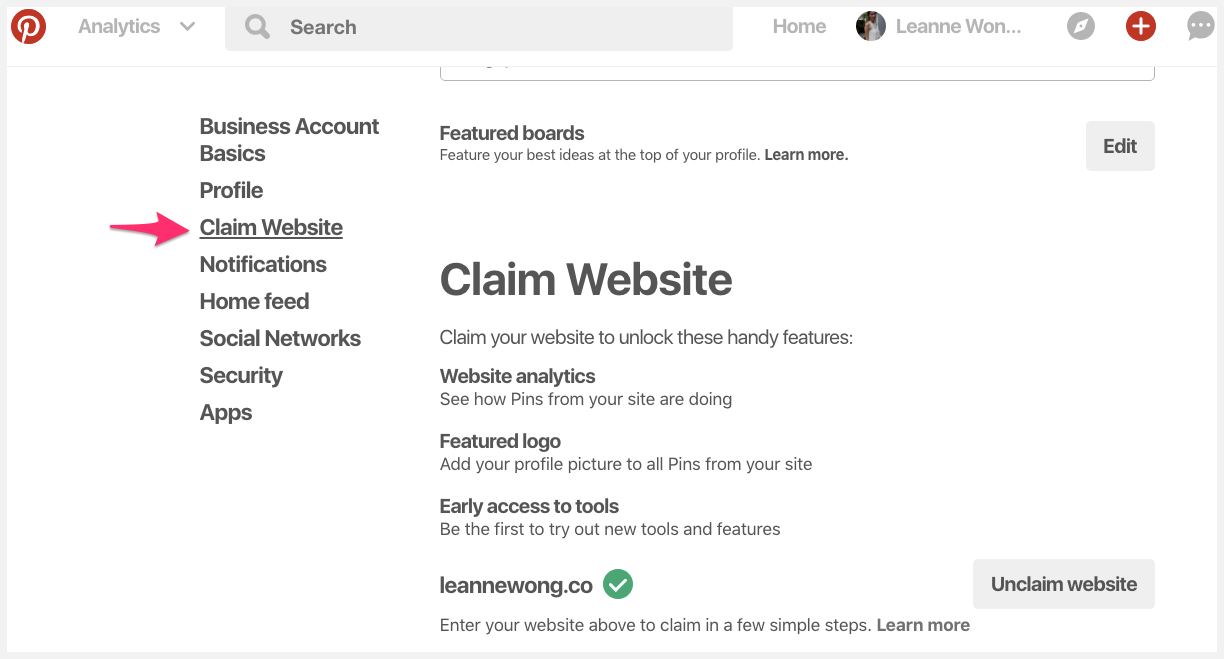
Step 3: Claim your website on Pinterest
Final step is to claim your website.
This will ensure that any Pins from your site will have your profile picture added next to them.
You’ll also get access to website analytics so you can see what people are saving from your website.
First, go to your account settings and in the ‘Claim Website’ section, enter your website URL and click on “Claim website”. Then, copy the meta tag.
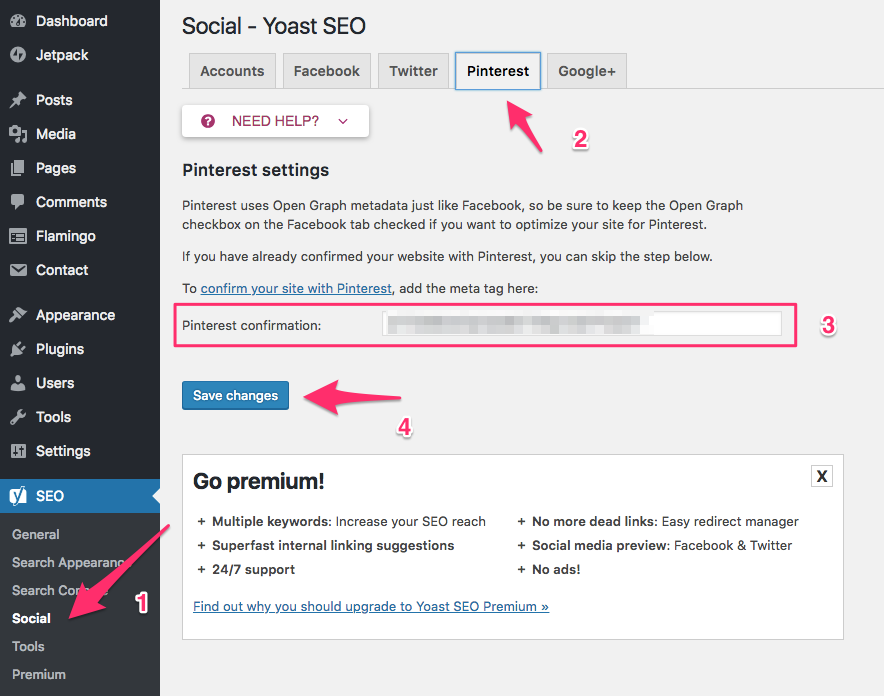
Next, go back to Yoast Plugin and in the ‘social’ section, head to ‘Pinterest’ tab.
Paste the meta tag you’ve just copied.
Give it 24 hours for the confirmation email to arrive in your email.
Yay! The rich pins setup process is over!
Not too difficult, huh?
Confirm Rich Pins Type in Pinterest Analytics
Head over to your Pinterest Analytics dashboard and look out for the ‘R‘ under Pin Type, which means it is a rich pin.
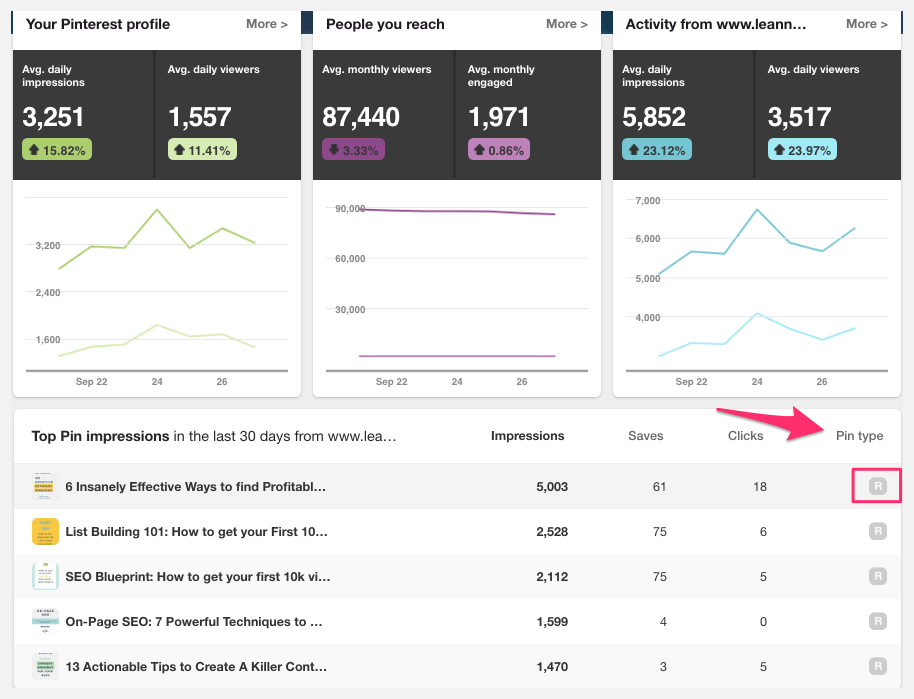
Awesome, rich pins are confirmed.
So this is a really quick way to confirm whether your rich pins have been activated.
How did you find this short tutorial? What are your results after activating rich pins? Share with me in the comments below!


26 people reacted on this
very nice post, i certainly love this website, keep on it
Thanks Caroline! Appreciate it!
This was super super helpful and straight to the point!! Thanks for sharing. xx BelleB
That’s awesome, Belle! Glad you found it helpful 🙂
need to retry again 🙂 had issues earlier but your steps make me feel i can do it
Yes you can, Vidya! Let me know how these Pinterest tips have worked for you 🙂
Some great tips here. Thanks for sharing.
No problem, Charlotte. Glad you enjoyed these pinterest tips 🙂
A great and easy explanation. Thank you 🙂
Cheers!
Thanks for this step by step guide. Will surely try this. Thanks
No problem!
This guide is super helpful and easy to follow. Rich pins is definitely one of the best things I’ve done for my blog!
That’s awesome, Sam!
Rich pins are SO important. I actually am surprised when I come across someone who doesn’t have them yet…
Absolutely, Angie! Rich pins are so important to succeed on Pinterest.
What a great quick tutorial for setting up Rich Pins on Pinterest! I’ve turned them on, turned them off, then back on again…I’m still unsure how I feel about my recipe ingredients all being listed on Pinterest when the Rich Pins feature is turned on. My final decision on this is still up in the air!
Happy to help, Denay 🙂
Whoa! I had no idea you could even do this in Pinterest! I will def have to give it a try.
Awesome! Yup, Rich pins can really boost traffic and conversions to your site. Give it a try 🙂
This is very informative and helpful. Great tips!
Thank you!
Thank you for this quick guide. You make it easier with the step by step directions.
Cheers!
I wasn’t sure about how to use rich pins but this is such a simple guide and easy to follow. Thank you for writing this 🙂
No problem, Ruth!